As you might have read from various recent blog posts, I’ve been having fun at the local drive-in. I’ve taken photos there, I’ve captured fireworks there, and now I want to try something very special with a piece of drive-in iconography.
I want to take one of those old car speakers – you know, the ones that hung from your driver’s window at the drive-in, the ones that had the buzzy sound to them, the ones that destroyed your window when you drove off and forgot to put the speaker back on its little pole – and modernize one. Clean it up, snazz it up, and make it more functional today. To do this, I’m going to go step-by-step in this blog, so that if you want to do this as well, you can. Some parts of the speaker will be refinished, others will be replaced. But in the end, it will look incredible. Trust me on this.
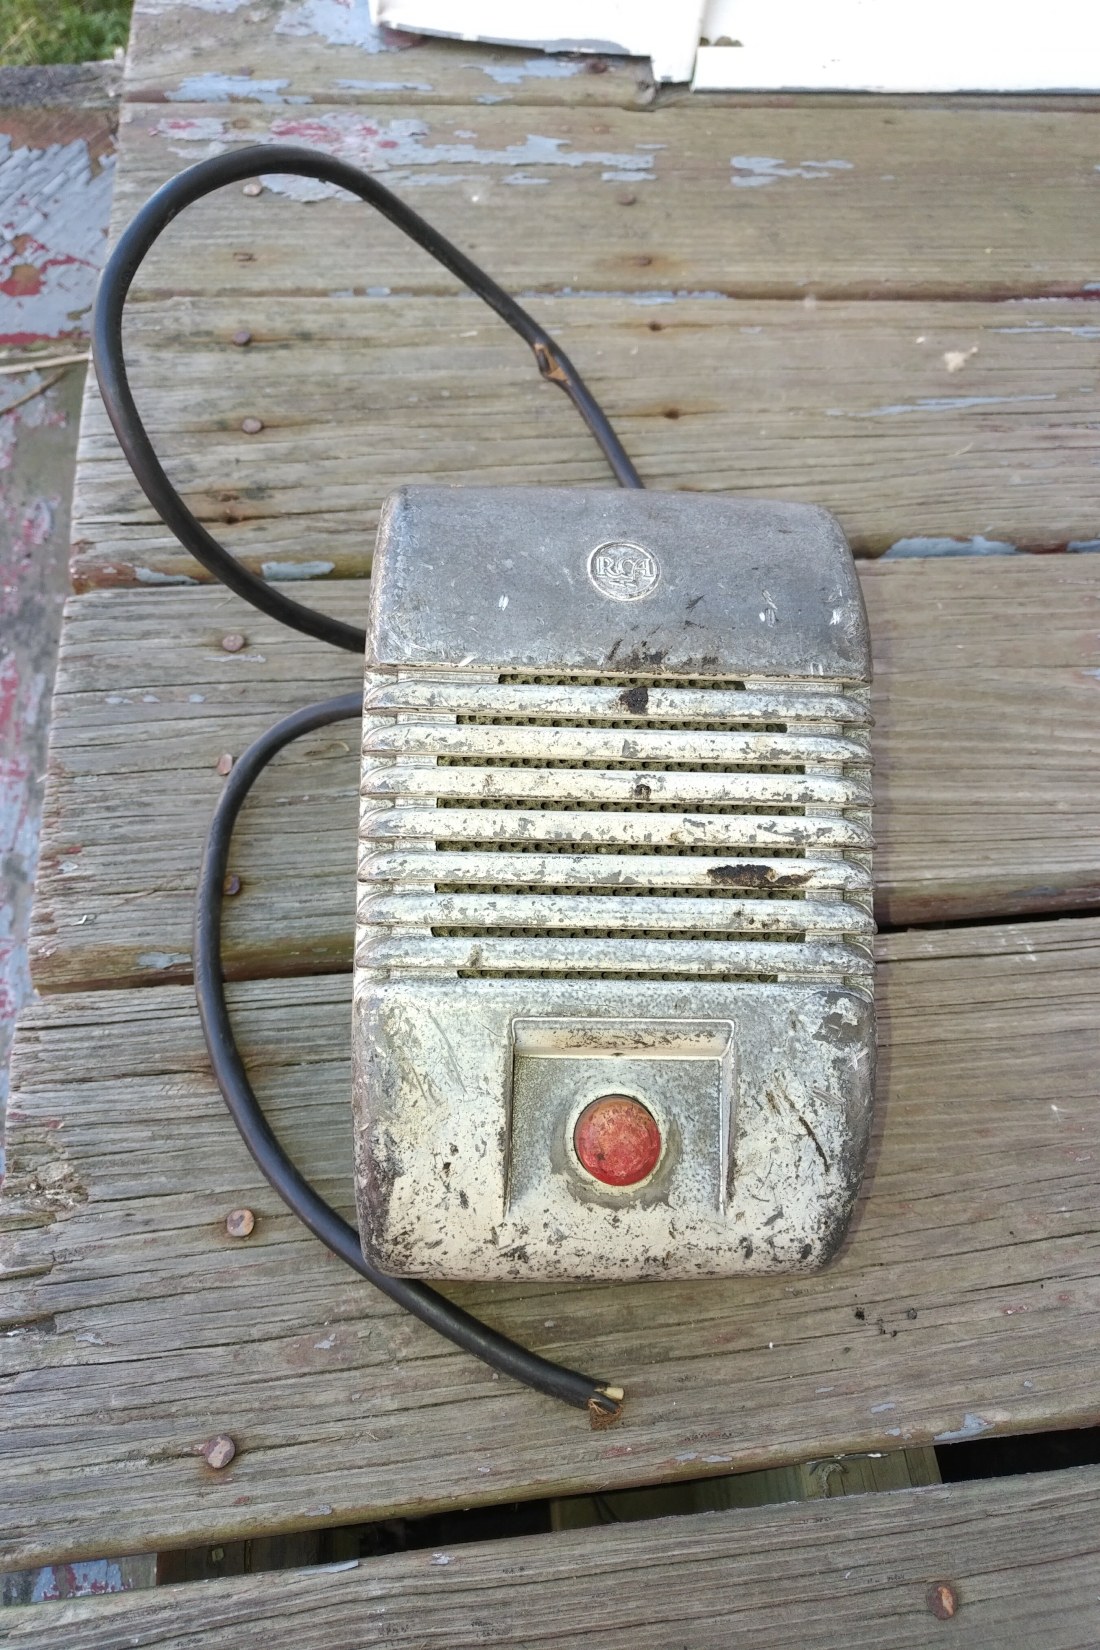
So here’s our subject.

This is a vintage RCA car speaker. RCA was one of the top manufacturers of drive-in speakers, and if you’re going to start collecting these units, you’ll run across brand names like Eprad, Ballantyne, Reed, Koropp, CBX, Projected Sound and others. But RCA units are good ones to start with. As you can see, though, this unit has seen a lot of double features. The cable is chewed and frayed, the casing is scuffed and scratched, the volume knob is pitted, and who knows what kind of gunk and oxidation is covering this chassis?
Here’s the back end of this unit.

There’s some weird sticker residue in the lower left corner of this unit. The case is missing one of its three screws. And this unit is unique in that, as a design feature, it sends the speaker cable out of the hanging part of the chassis, rather than from the side.
Okay, let’s get this bad boy open.
Oh, I forgot to tell you. You’ll need a special screwdriver to open this. Right off the bat, this will be a challenge.
See, instead of using flathead or Phillips head screwdrivers, these units used a couple of different theft-resistant screws to hold the unit together. Sometimes you’ll find Gulmite screws, which need a special drill bit extractor. In this case, this unit had Holt screws, which look like Philips-head screws, except that the center of the screw is raised. You need a four-pointed screwdriver to get those screws out. Something like this.

These screwdrivers can be found on the internet for about $12. And if you want to replace your screws with flatheads or Phillips heads, that’s your call. I figured if I’m going to buy this screwdriver, I’m going to also replace the old Holt screws with new Holt screws. Yes, you can get new Holt screws as well. I’ll have links to various repro and NOS product companies at the bottom of this blog post.
Okay, let’s open this bad boy up.

Archeology time. The cable was knotted inside, to keep someone from trying to yank the speaker off and leave the cable at the drive-in. The cable itself has two leads soldered to the volume control, or potentiometer, which in turn has a couple of connections soldered to the speaker. And look, the screws that are holding the speaker to the chassis – those screws are flatheads, so four screws removed there, and two removed on either side of the potentiometer.

Now I need to make sure that I take pictures of how the speaker is wired to the potentiometer, and how both are wired to the cable. Take pictures now and refer to them later.

Maybe I can save this speaker. Most times, the internal speakers on these units are ripped and rotted. In some places, you might open these units and find that the speakers were wrapped in plastic bags, to keep ants from crawling up into the mechanism and chewing on the wires. Other times, the speakers are remarkably in decent shape.
So can I save this speaker?
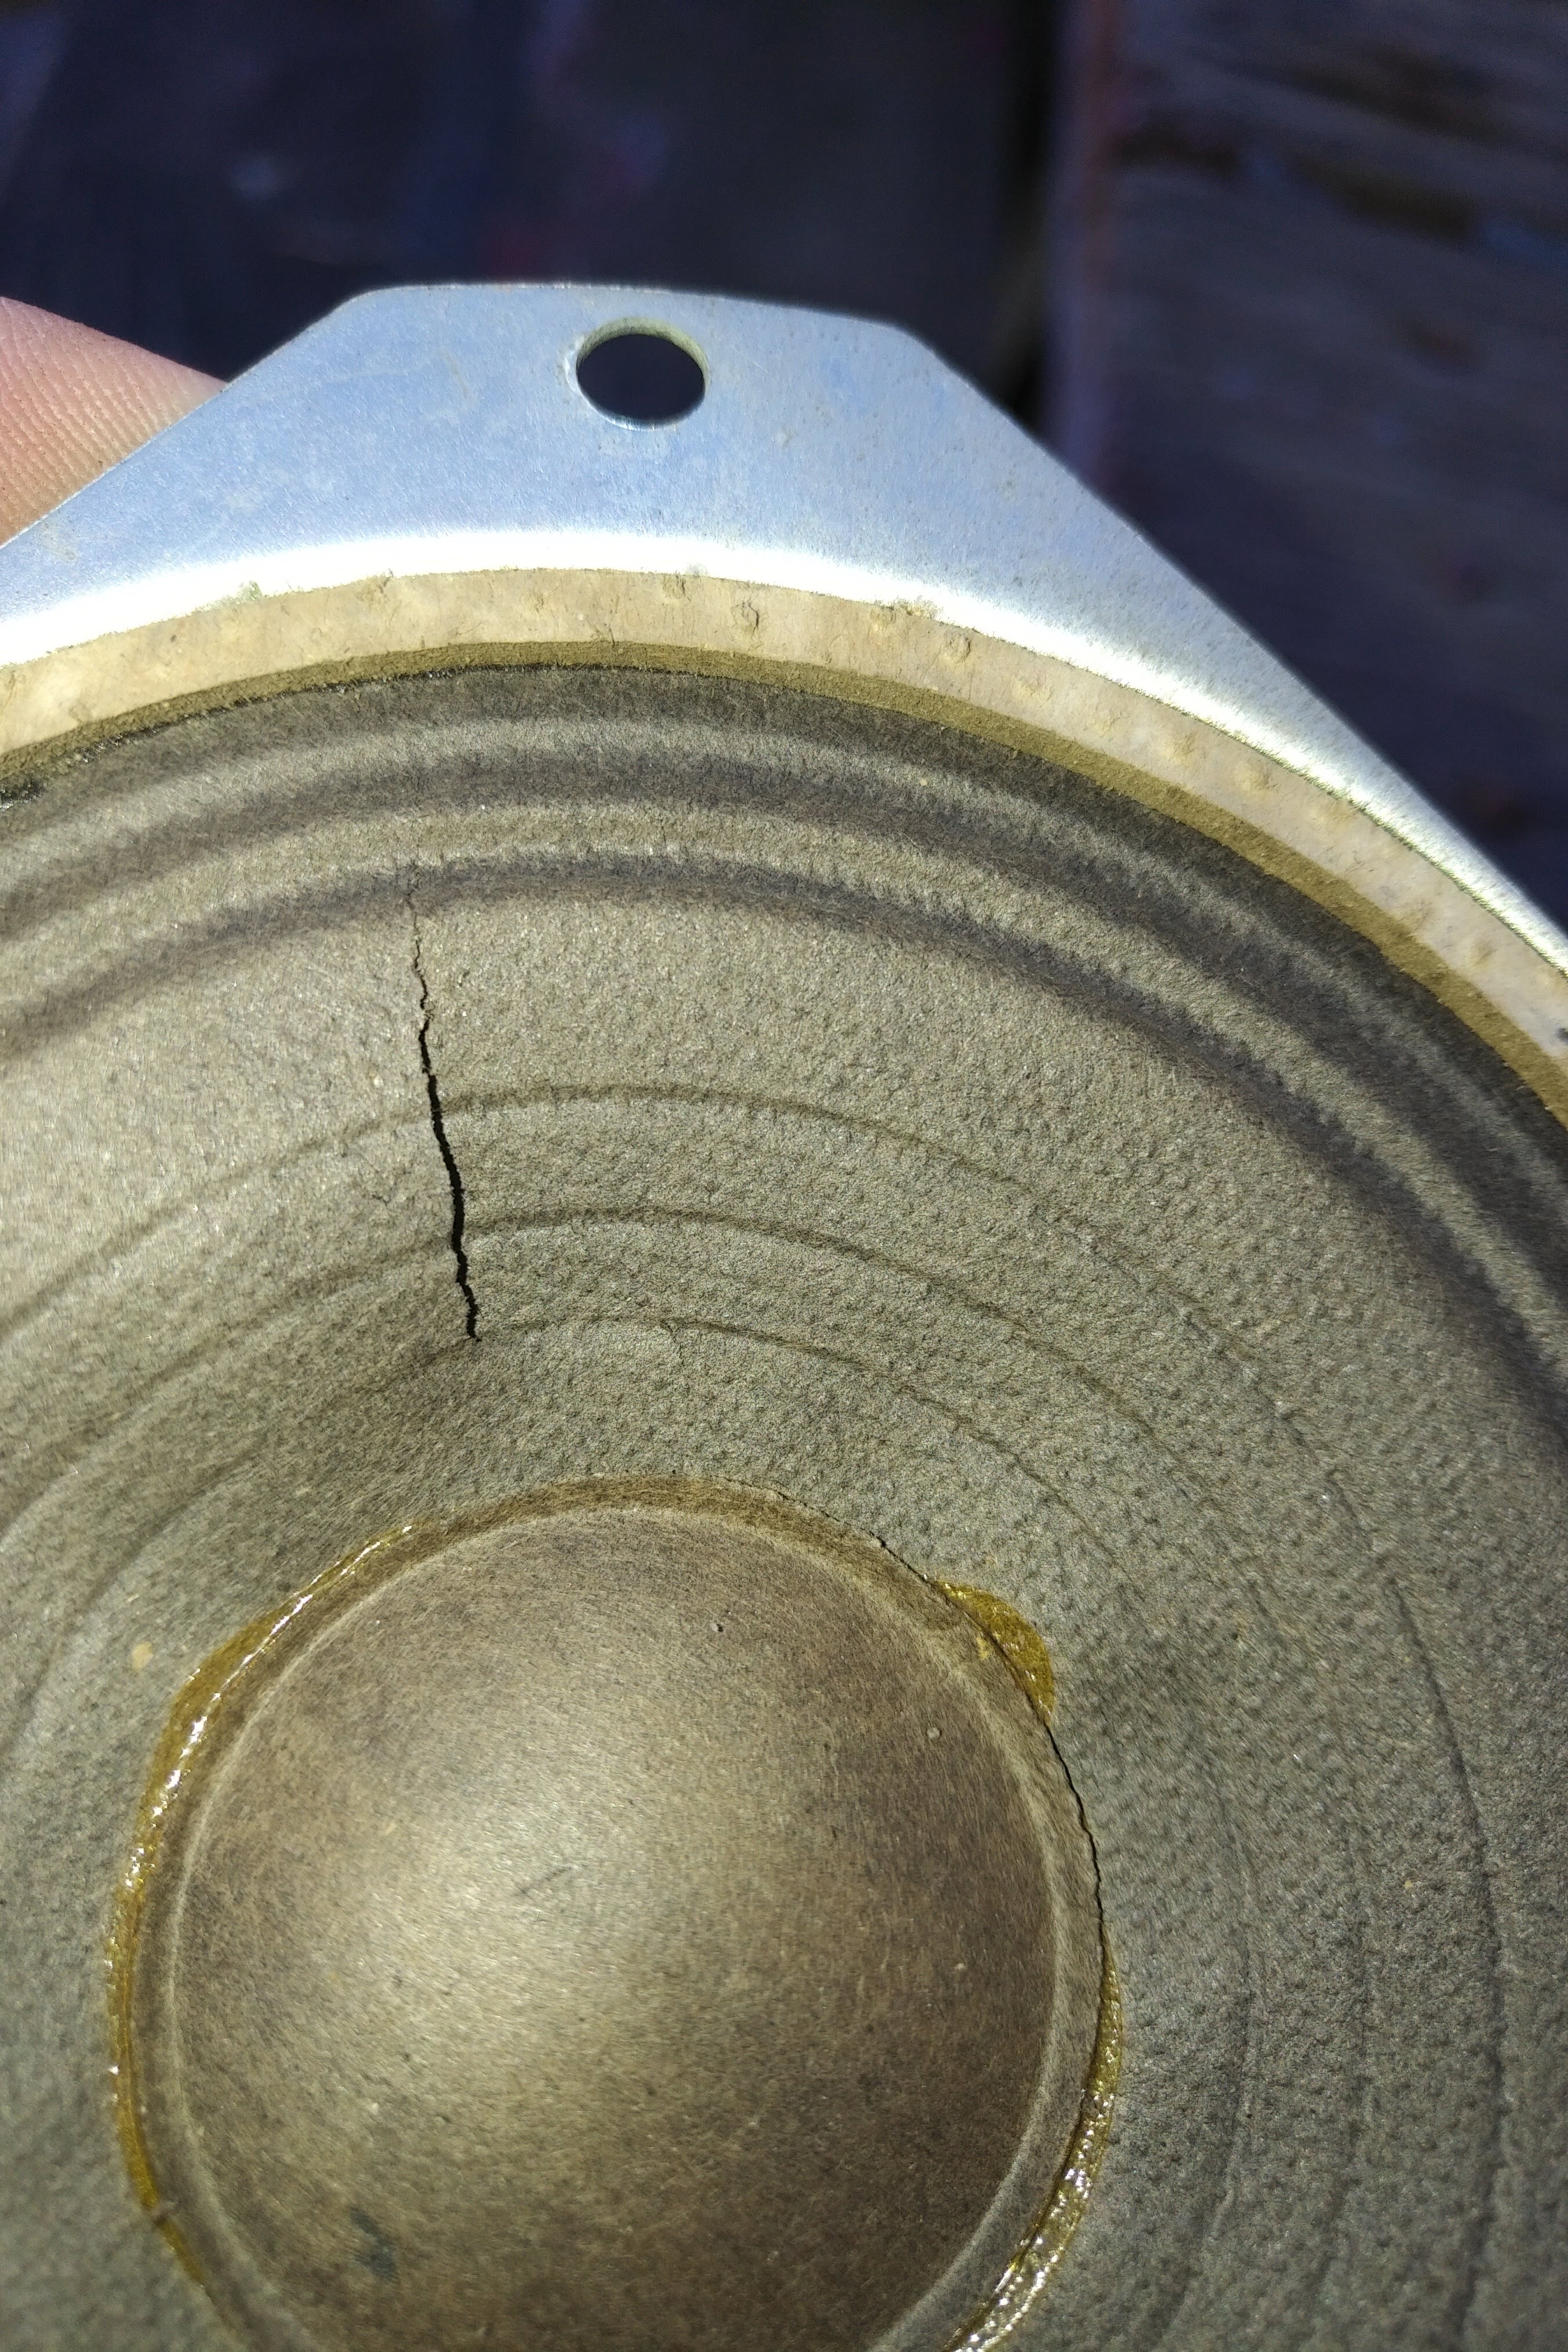
Nopes. Look at that tear. This thing’s going to have more buzz in it than a showing of Bee Movie. Speaker has to be replaced. And by that token, so too does the cable. It’s got more holes in it than a perjurer’s alibi.
Now I have to take out the potentiometer. Loosened two flathead screws, and up it comes.
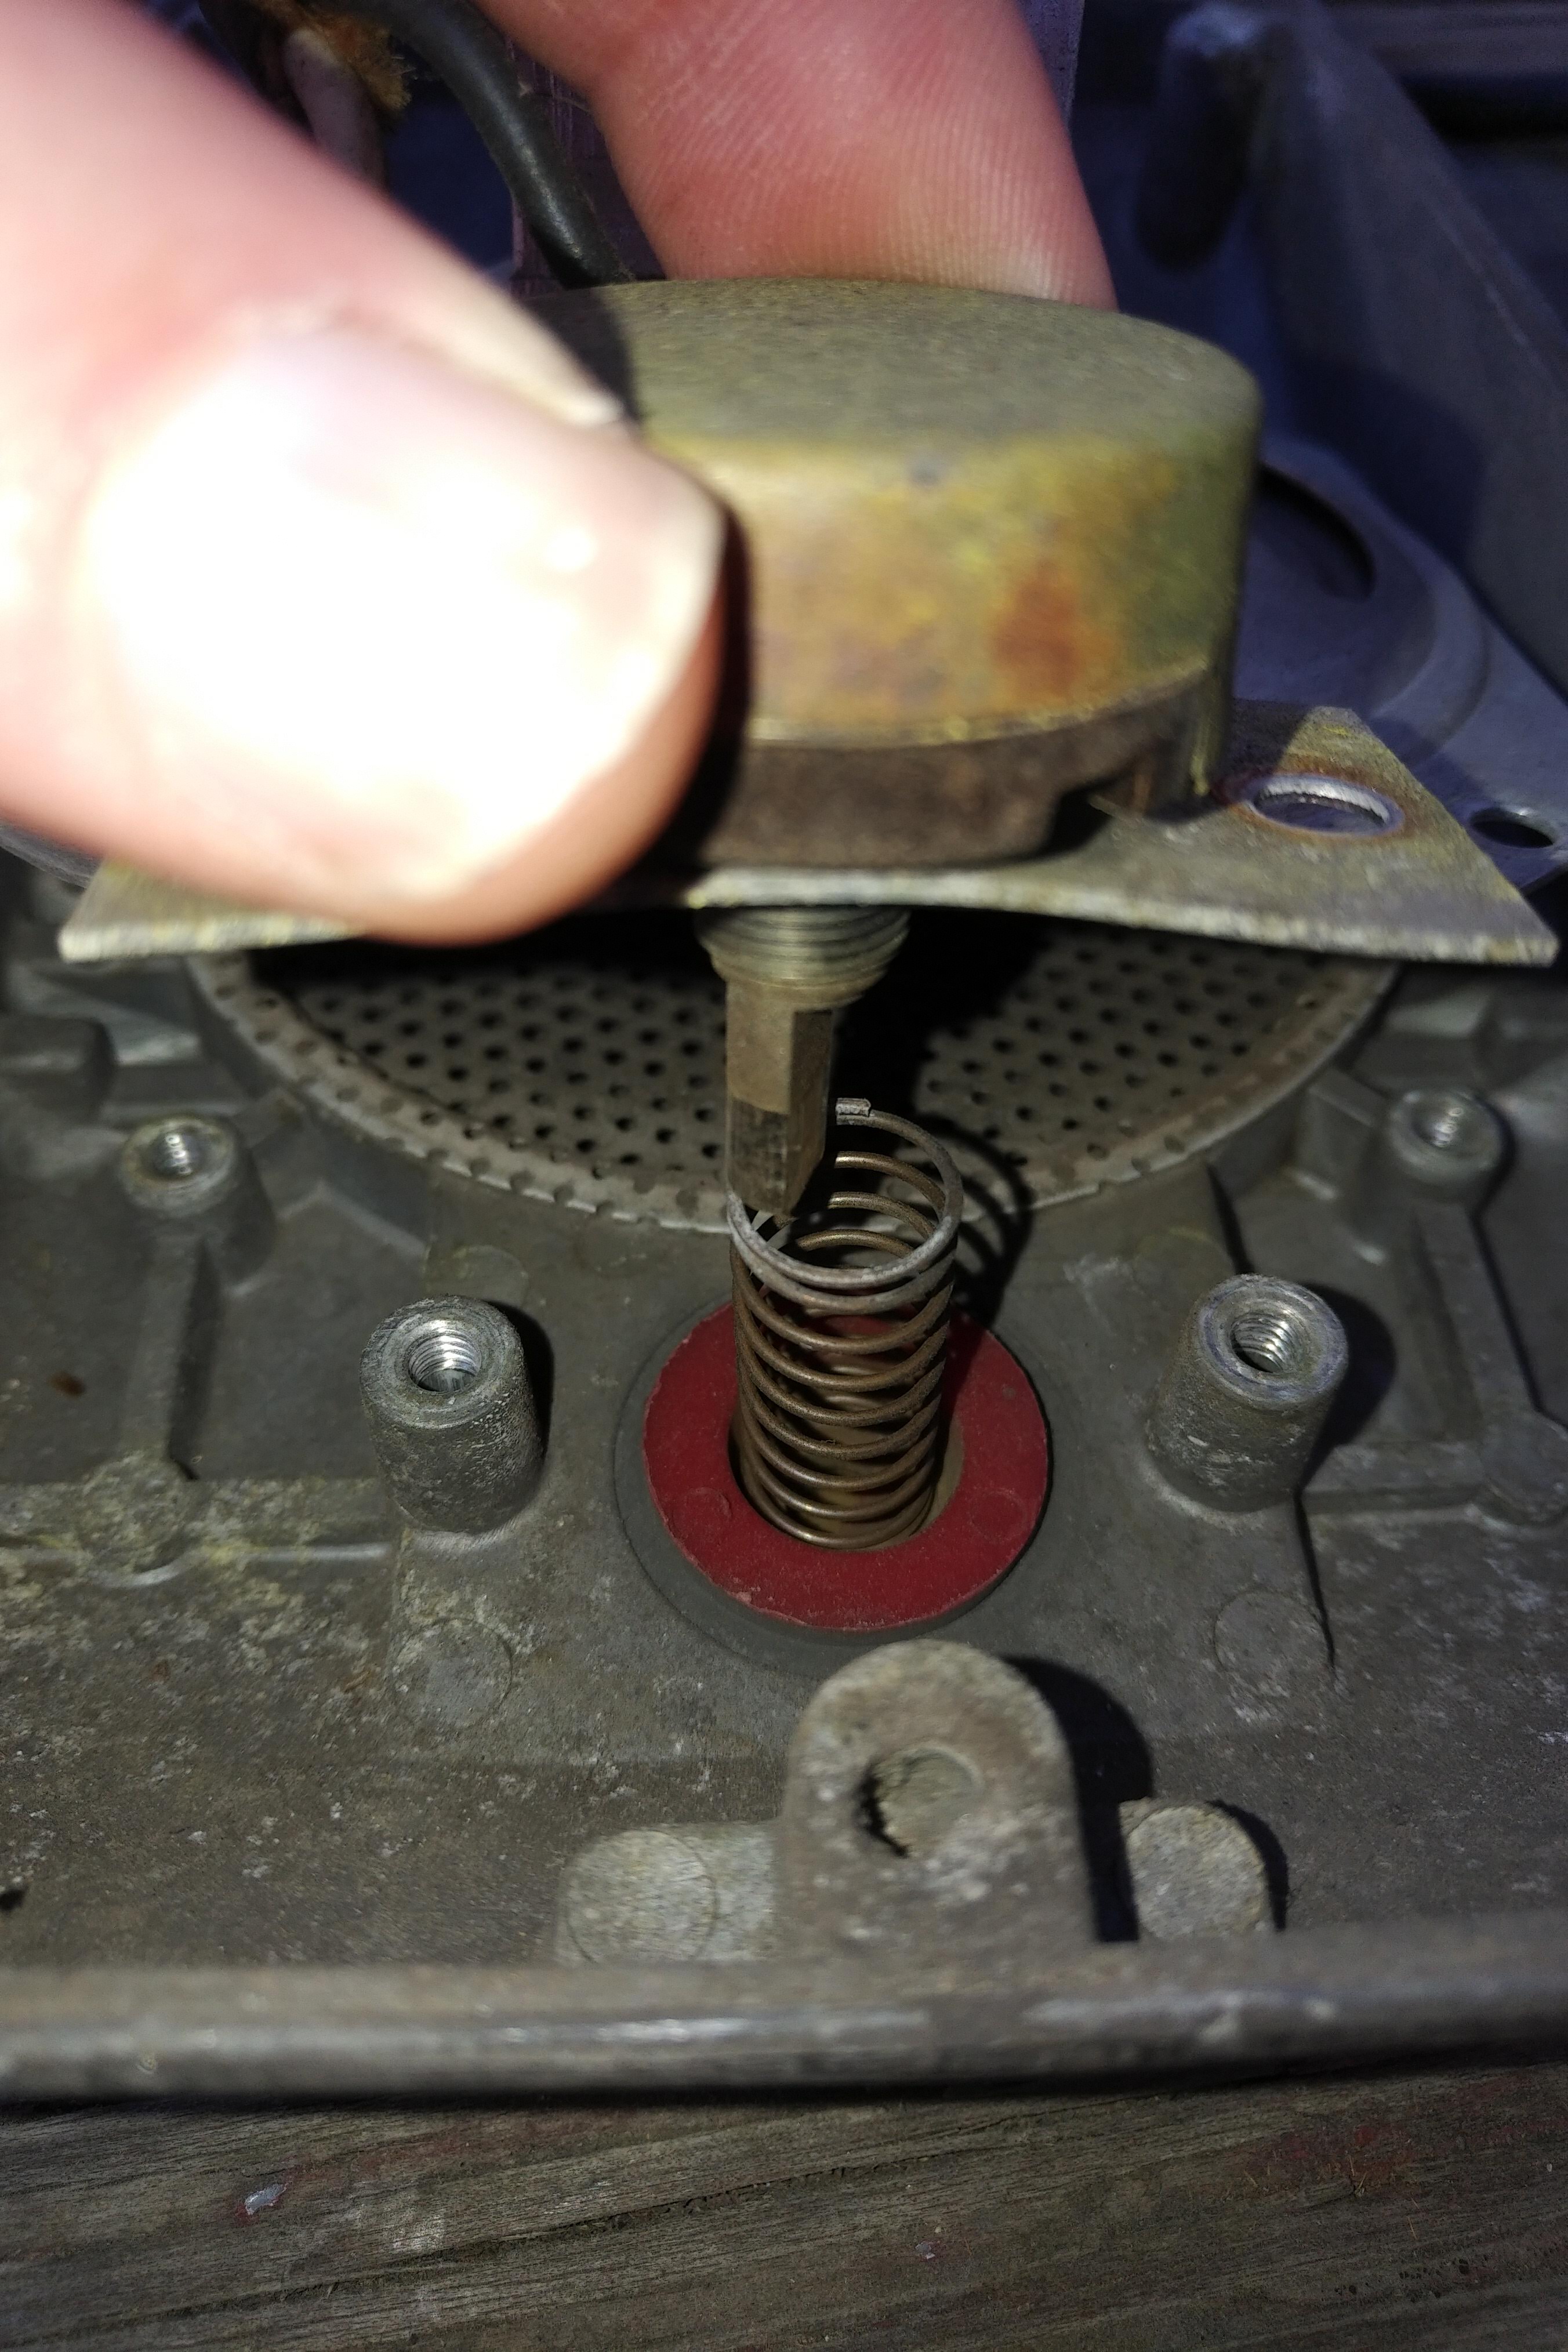
This is important. The potentiometer contains a post that goes through a coiled spring, and the post connects with the plastic volume control. You know, the red knob.
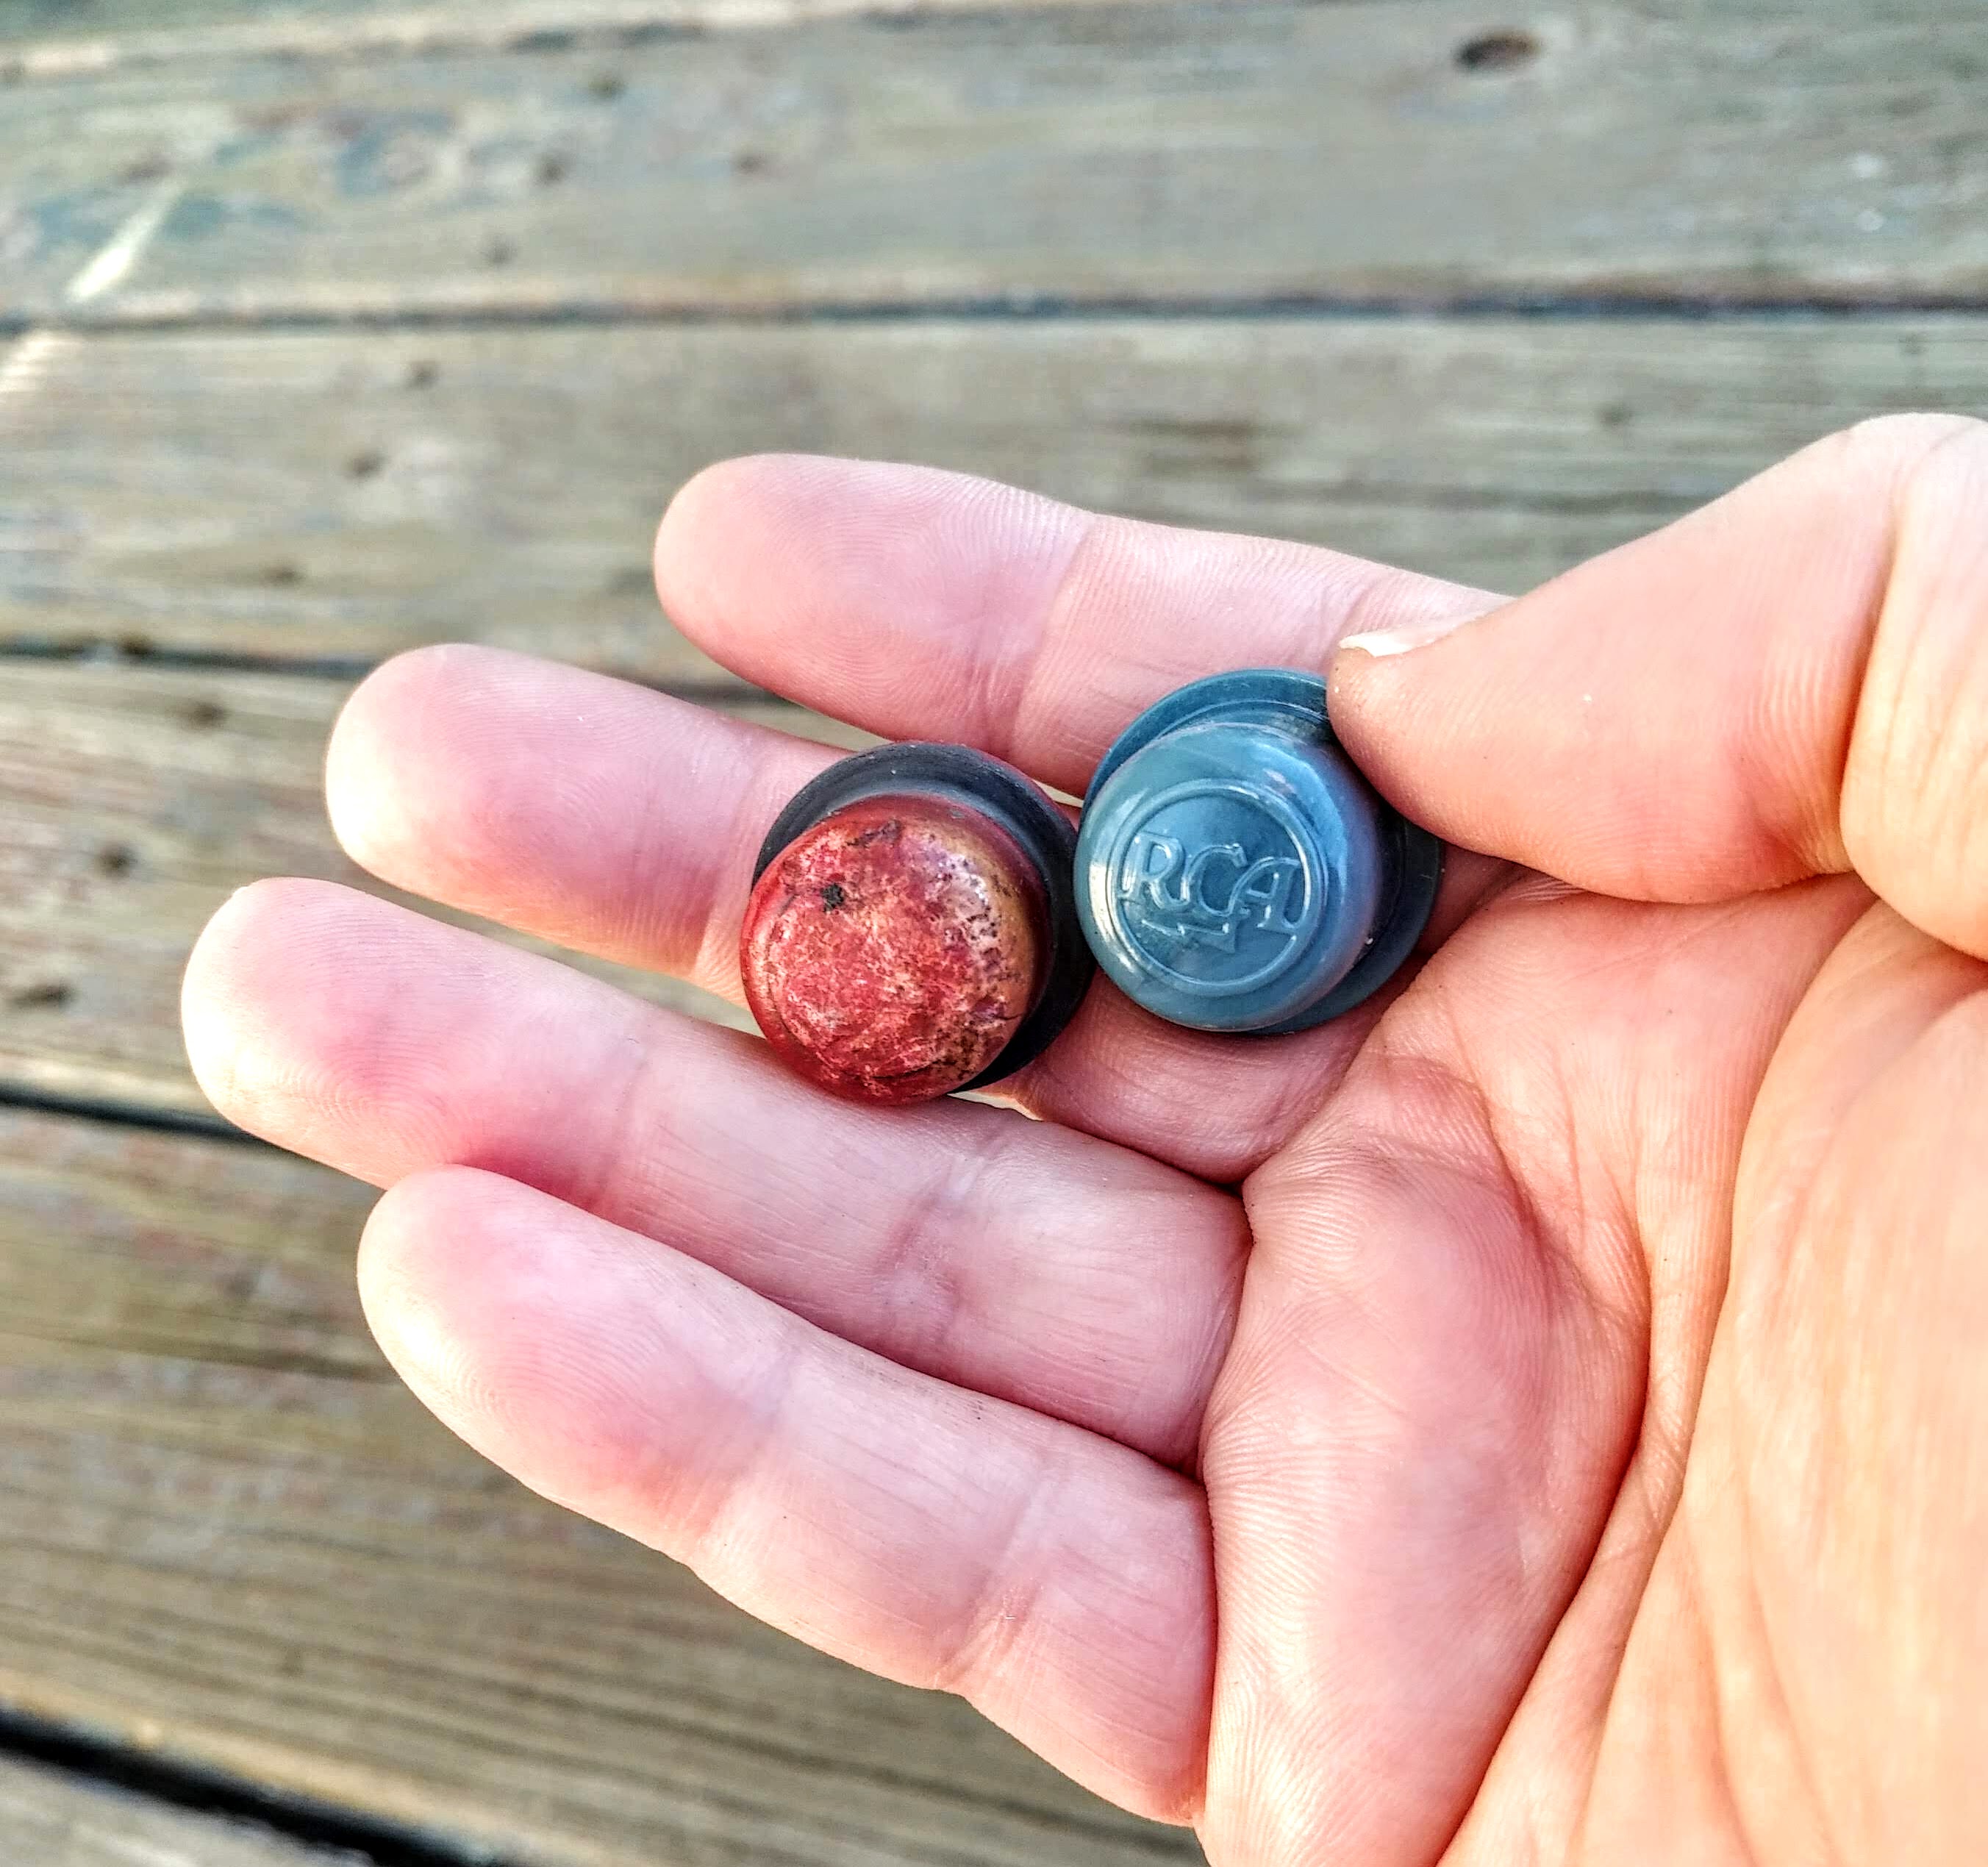
This red knob. Well, it’s sorta red…

Yeah, that’s getting replaced. Thankfully, there are replacement parts for these speakers – everything from new potentiometers to speakers to RCA knobs. Look, I could spend days trying to re-polish this knob, or I could just order a new plastic replacement. Plastic replacement it is.
Oh, and when I removed the speaker, I also examined the speaker grille. It’s in decent shape, but boy does it need a cleaning. These grilles weren’t manufactured with tiger stripes, those are years and years of dirt from the outside air bonding and darkening the grille.

I put all the screws, speakers, cable and innards into a sandwich bag. This way, nothing gets lost. Trust me, this is a trick I learned from reading Zen and the Art of Motorcycle Maintenance.

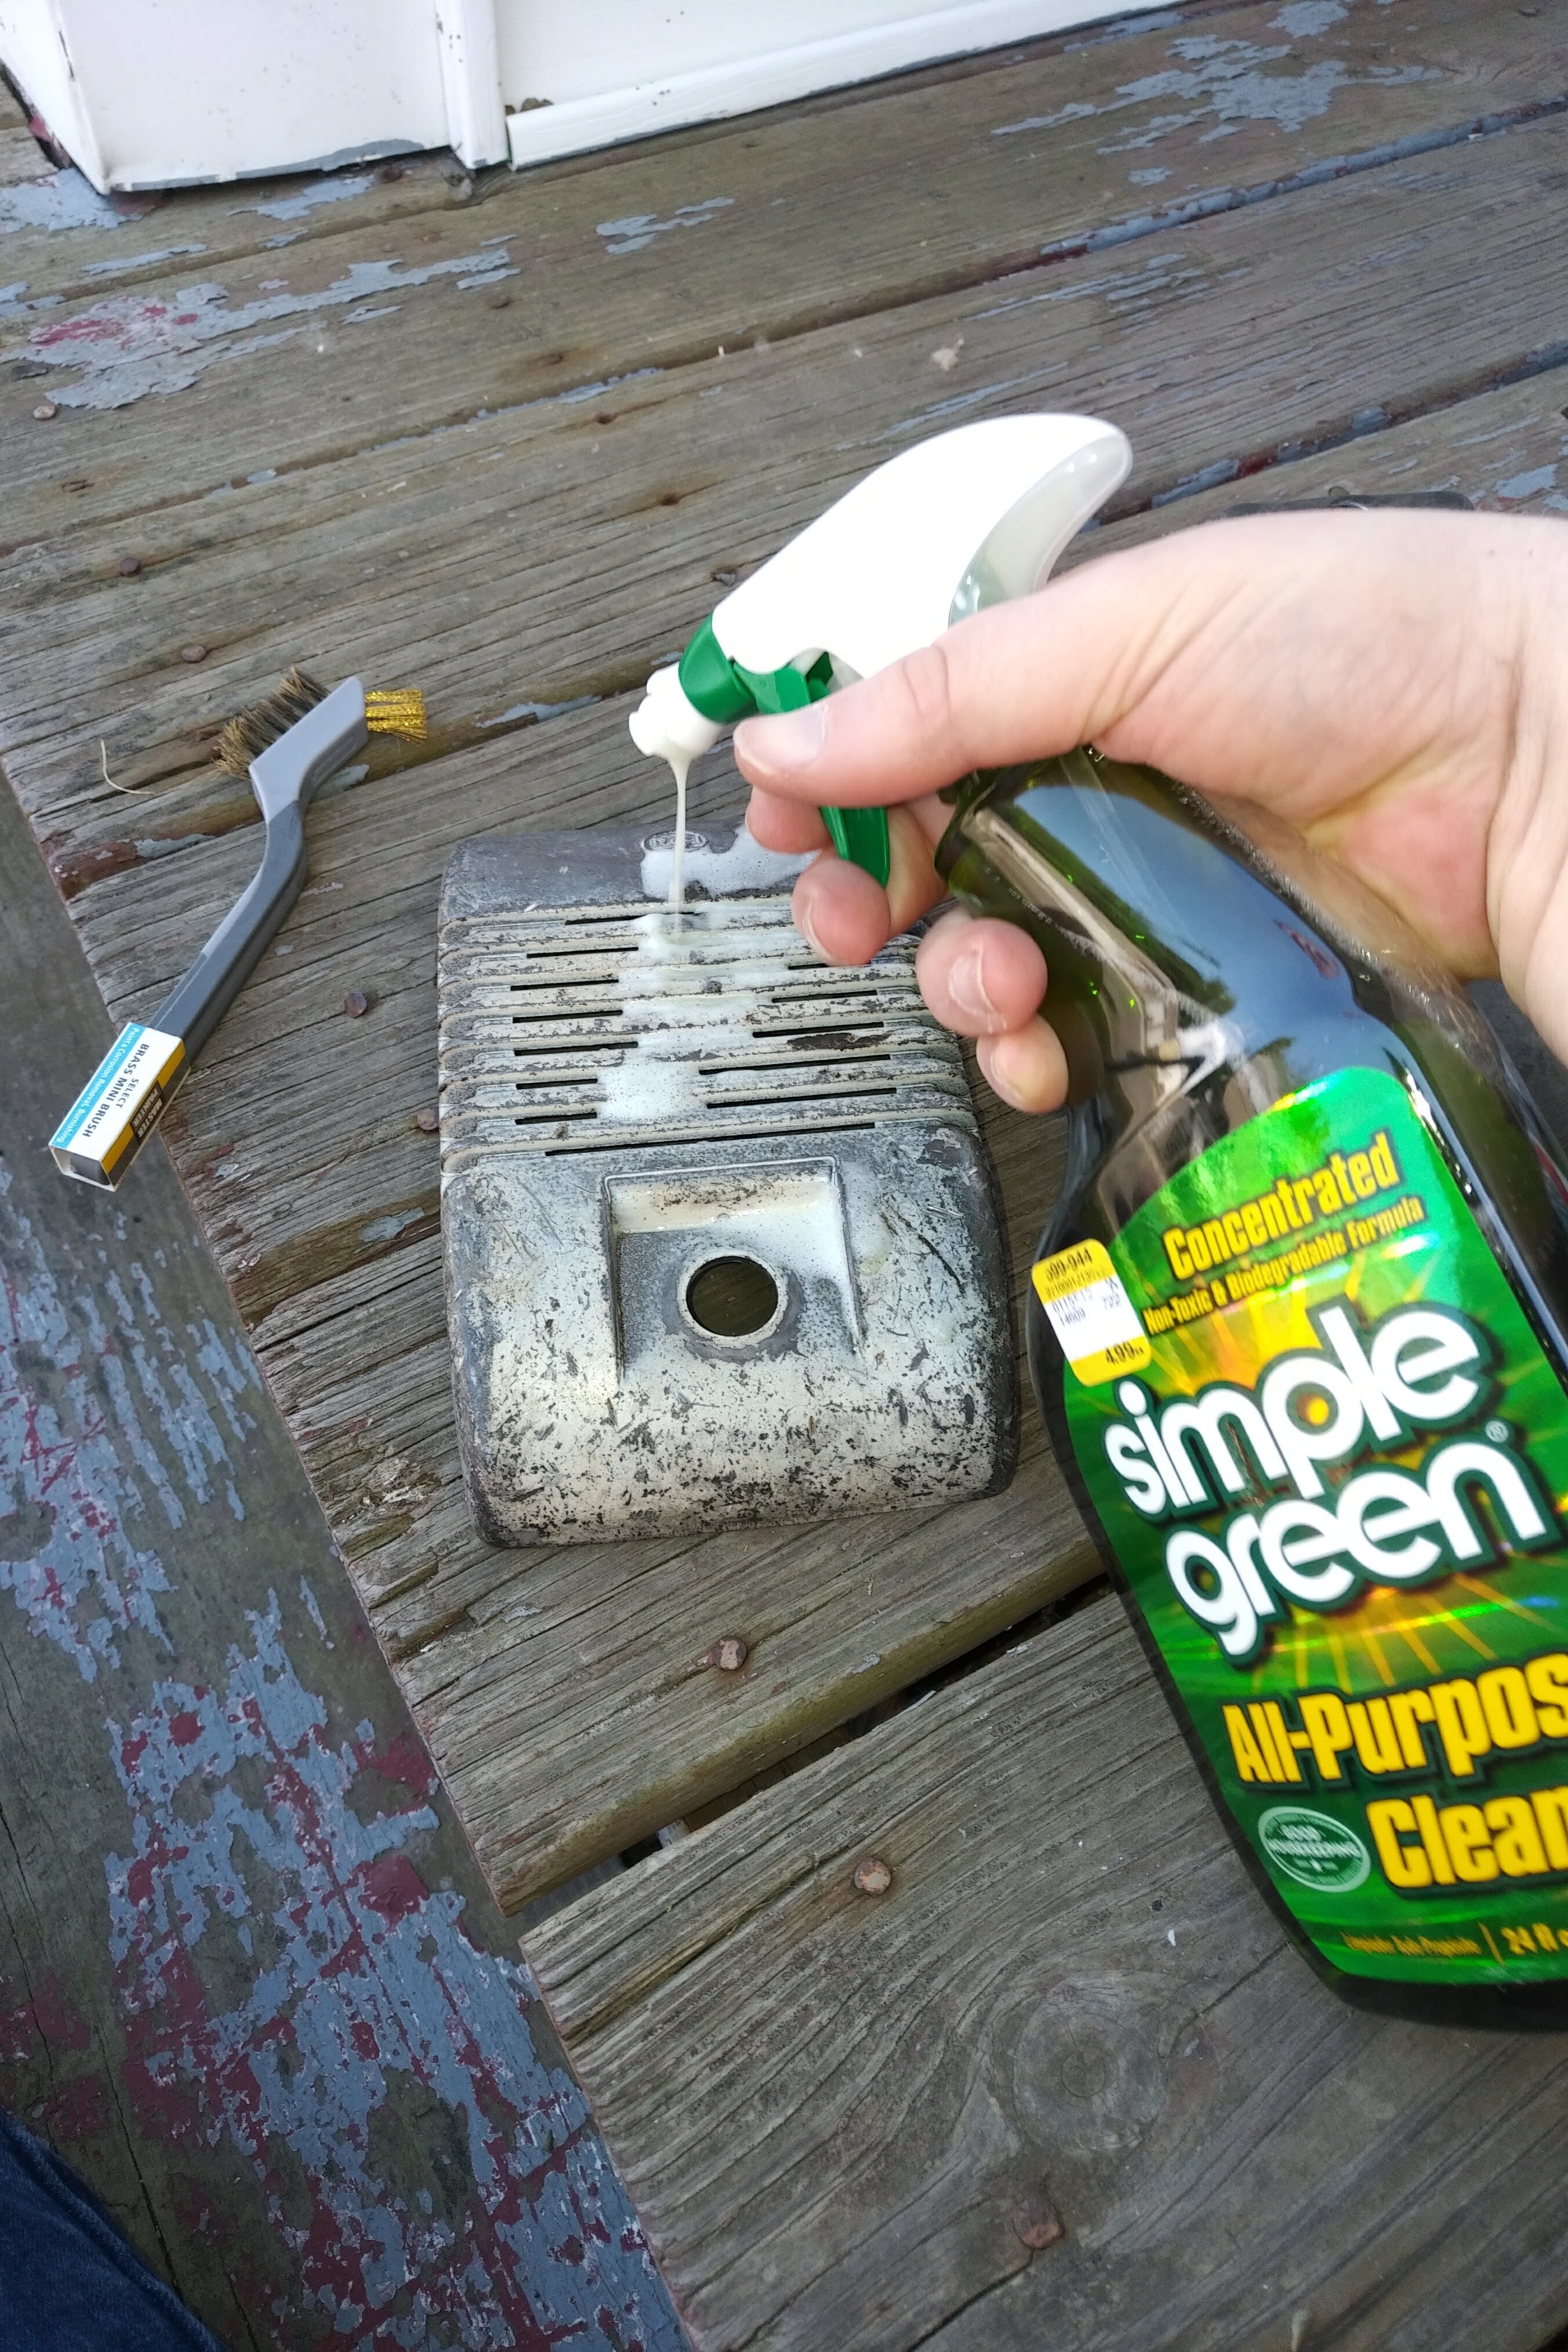
So let’s start cleaning the speaker. I squirted some Simple Green on the aluminum speaker boxes, and scrubbed them down with a soft wire brush.
Scrubby, scrubby, scrubby…
Then, I took some sanding sponges and scrubbed the aluminum as hard as I could. 80 grit, then 120 grit, then 220 grit.

I’ll need to sand these again, but for now, they look rather good.
Now I could leave these boxes as they are, because they’ll have a nice, shiny patina, but come on, if you have the opportunity to make these things sparkle, wouldn’t you want to try to do so?
Yep. I’m breaking out the spray paint. Rattle cans or die. 😀
These boxes are made of aluminum, and you can’t just “paint” aluminum with a single shot of spray paint. Paint doesn’t normally adhere with aluminum, unless you first apply a self-etching primer to the aluminum. Luckily, spray-on self-etching primer does exist, and one spray can later, both units had a nice grey hue to them.

I knew I’d find a use for the leftover wood from those old soda crates from a few projects ago…
After giving each box a light sanding to remove as much “orange peel” from the primer, I had to decide on a color for this unit. Hmm… Richard Petty Blue? Penn Central Green? 1960’s Princess phone beige?
Yeah, no. We’re going with satin beach glass.

You know that looks swank.
I scrubbed the inside screen as much as I could, and maybe I took 10 years of dirt off it. But it still has nasty dirt stripes. Screw it. It’s going back in the chassis, I can only do so much with this.

See the bottom of the screen? That little straight ridge lines up with a ridge on the speaker’s chassis. In you go.
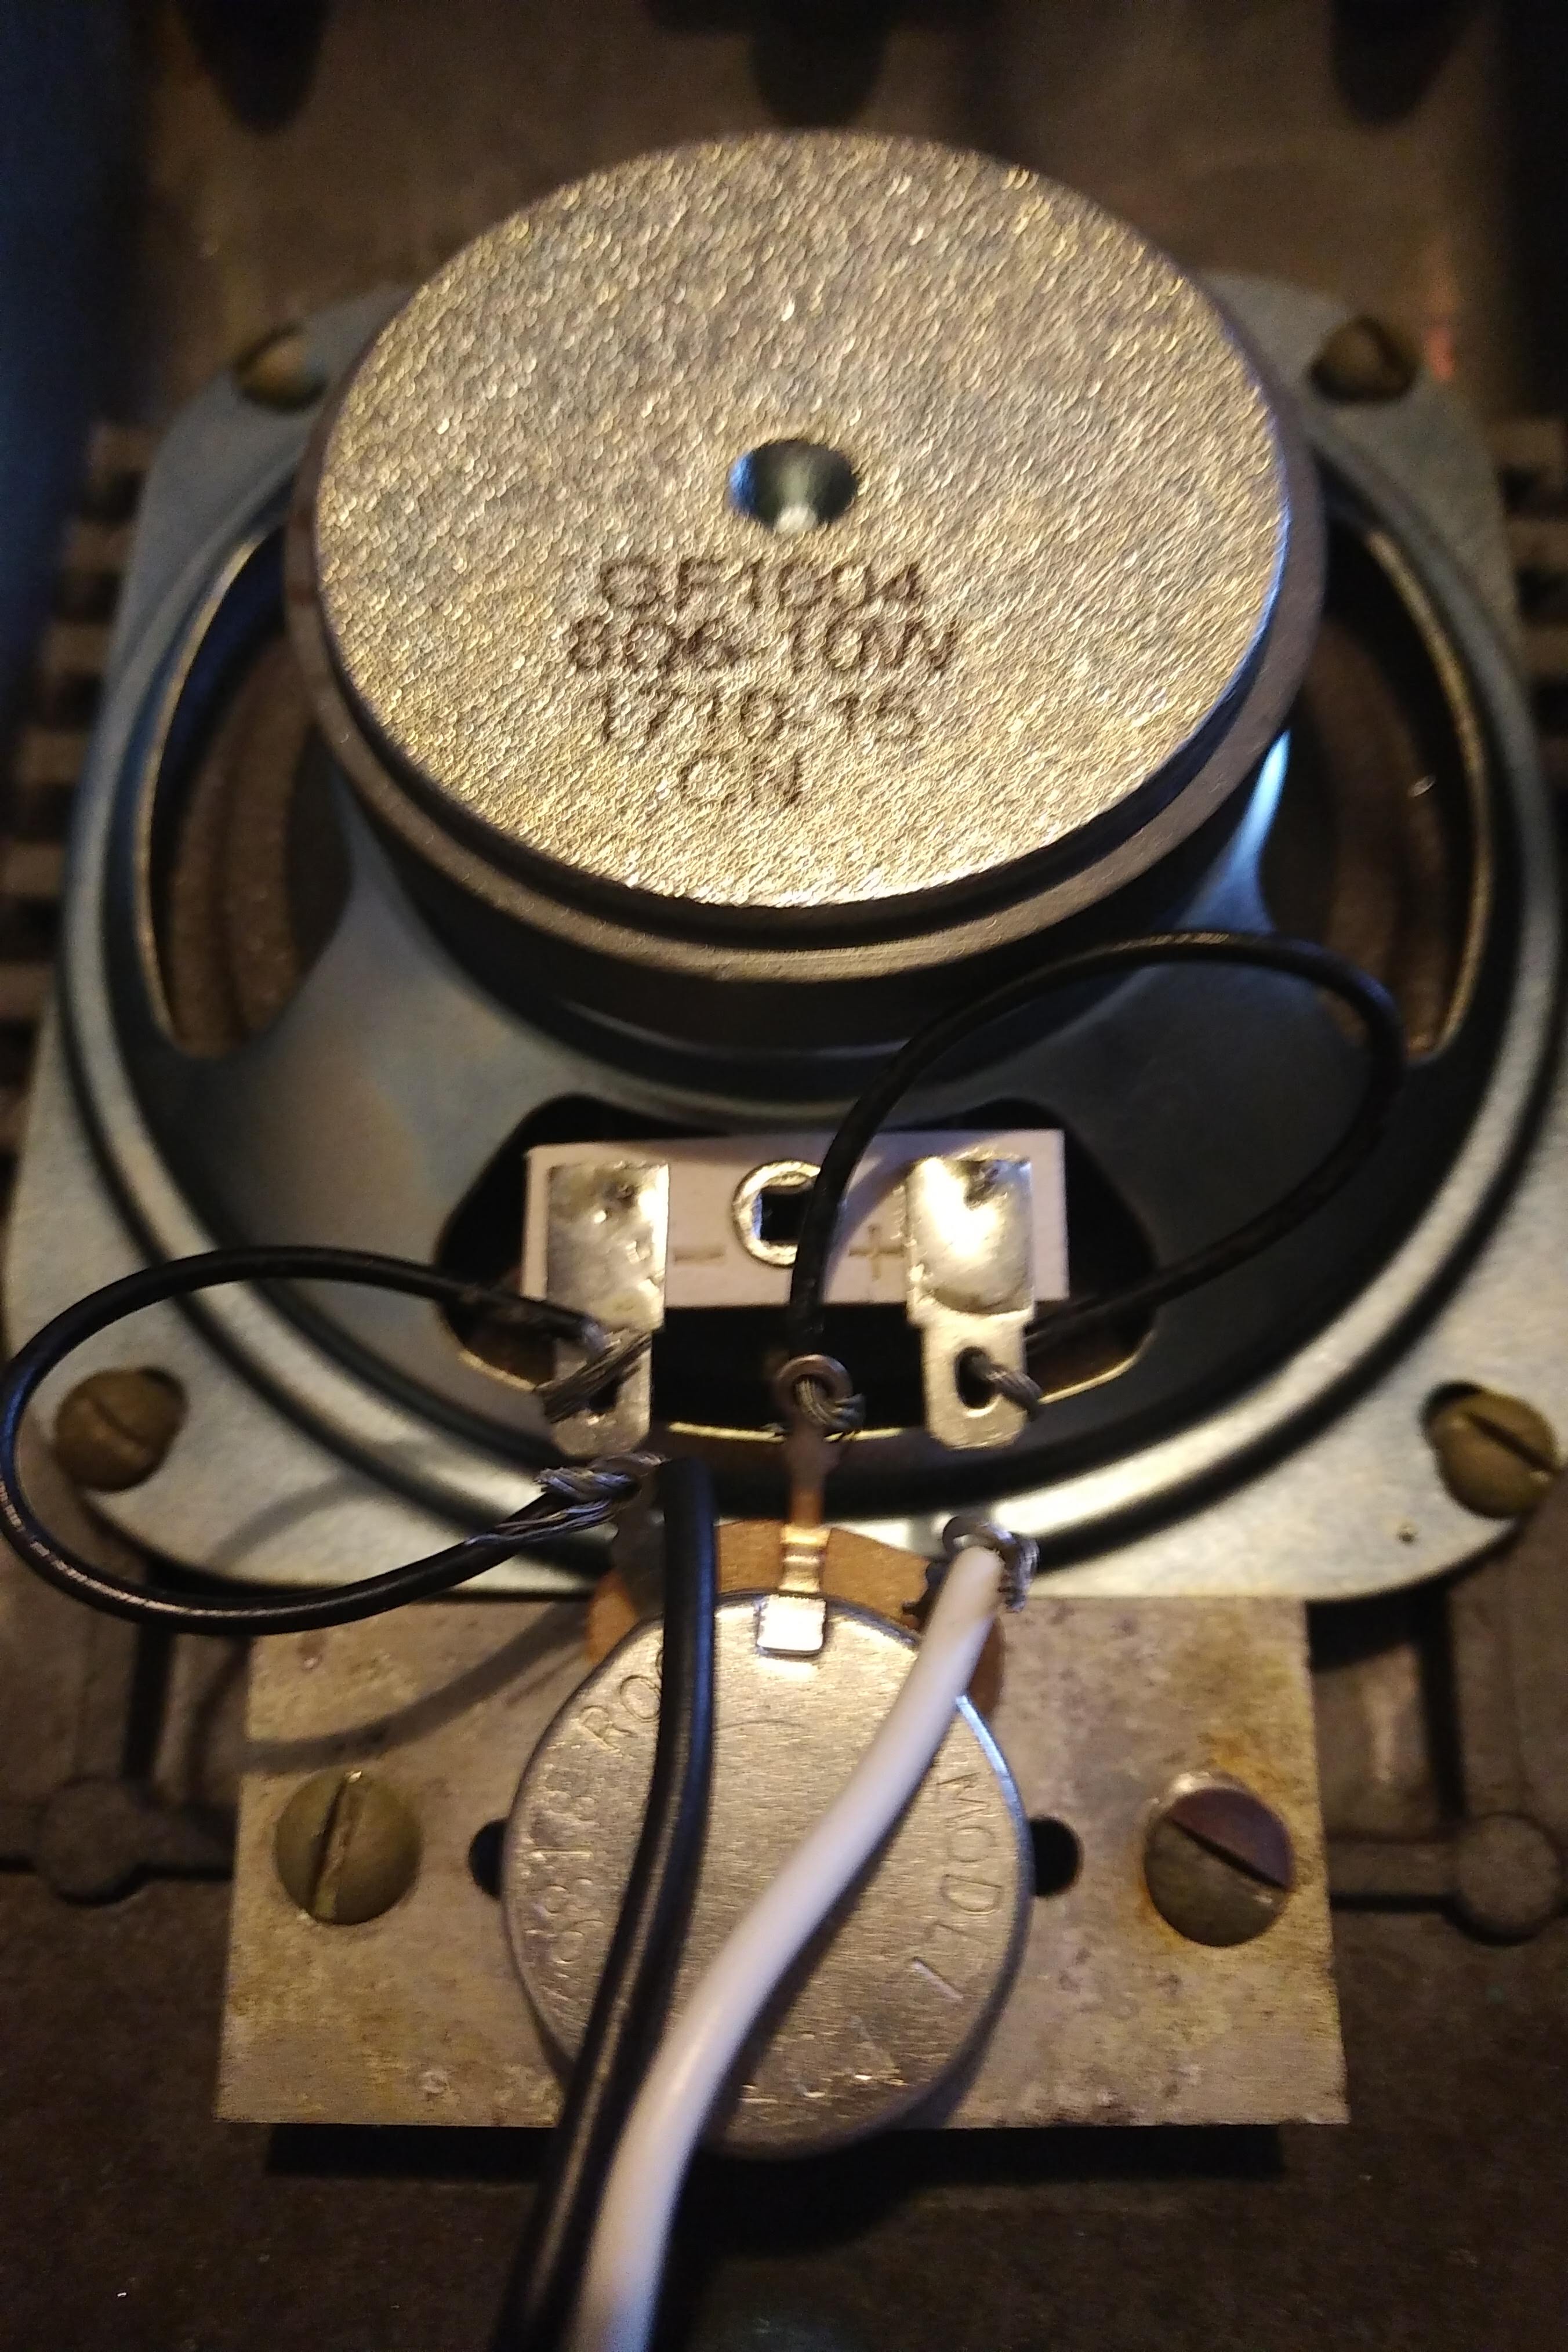
Now as for the original speaker … nah, it’s toast. I ordered a brand new 4″ 8Ω speaker. And what do you know, it fits inside perfectly.

I don’t know the difference between the volts and the ohms and all that, so if someone in the comments section wants to explain it to me like I’m five years old, that would be great. Anyways, the speaker is in. Screwed down as tight as possible.
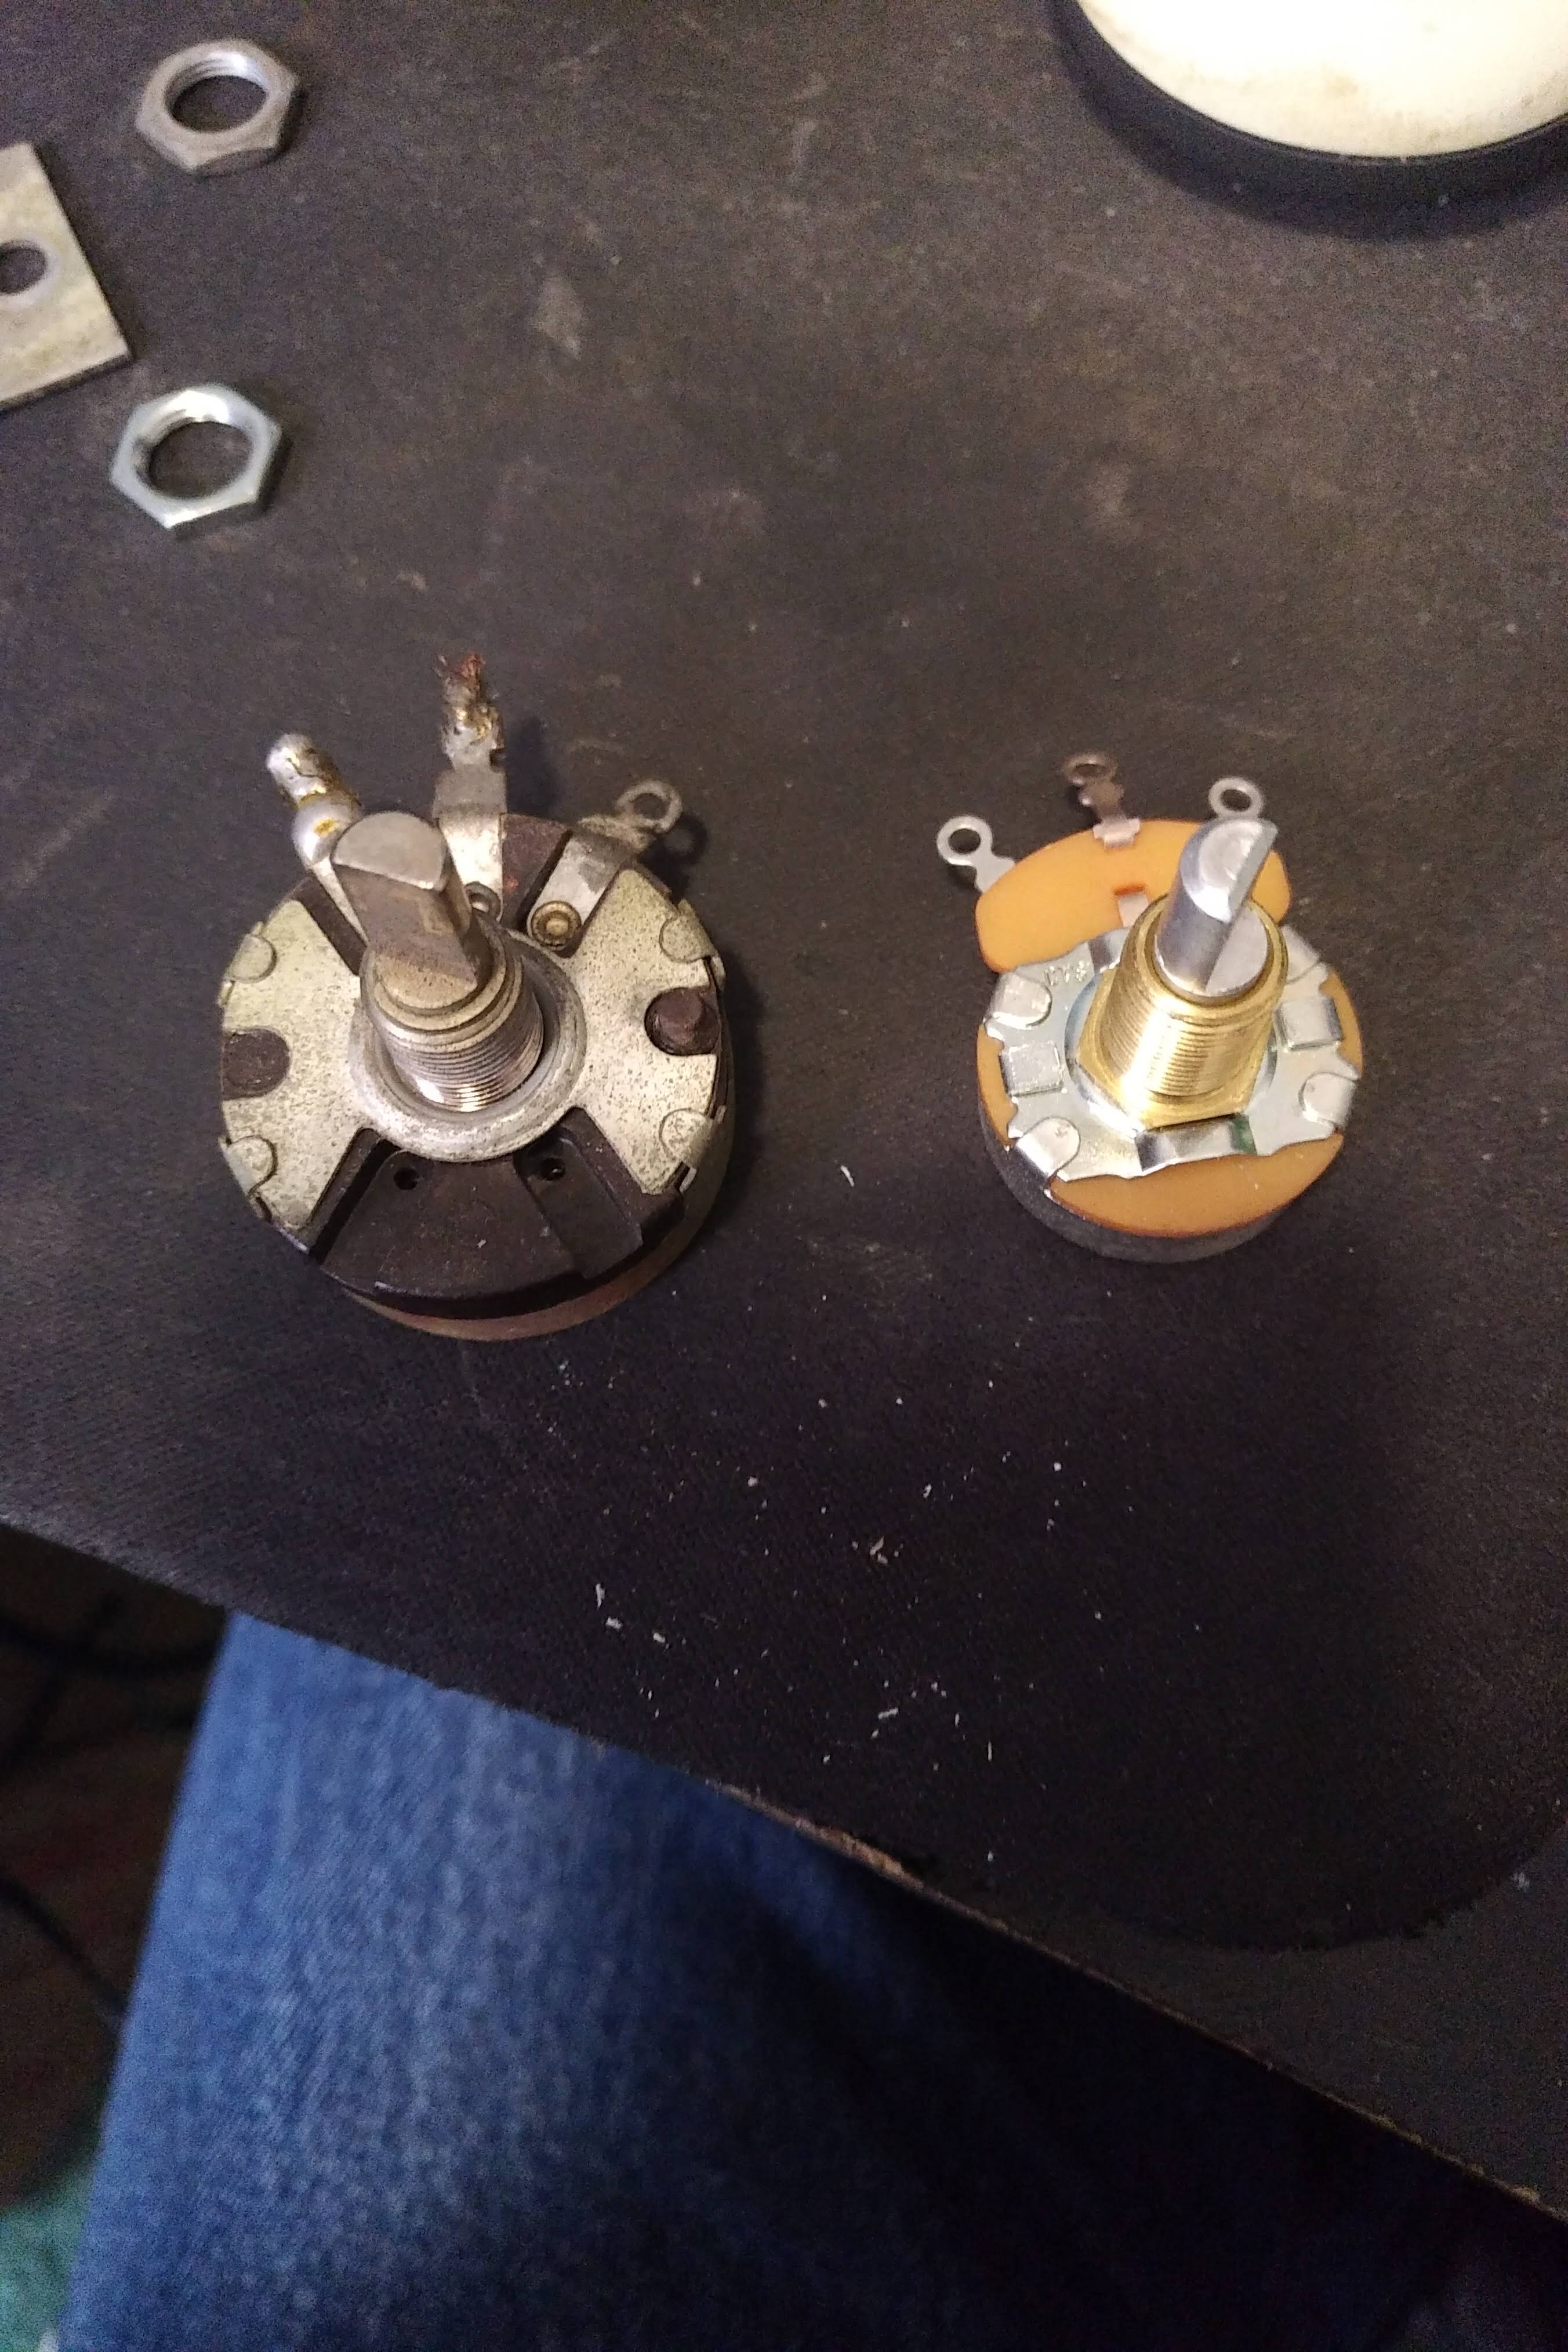
Now I need to replace the potentiometer. That’s the volume control device. I extracted the original potentiometer from what was left of the old speaker housing. I need that rectangular bar, that is where I mount the potentiometer, which is then in turn mounted to the inside of the faceplate.

Now if I had any true set of mechanical skills, I would take the potentiometer apart, check all the connections, remove all the old solder connections, clean and lubricate it, and re-assemble. Instead, I simply ordered a new potentiometer. The new one is on the right.
Hey, remember that scratched-up volume knob? Well, look at the difference a replacement RCA knob makes. And these knobs come in different colors – I could get a red knob, or a black knob, or a chrome-plated knob. I went with the muted blue knob. And as you can see, it looks much better than the old red knob, IMHO.
So let’s plug this bad boy in. I dropped the new knob into the housing, then added the potentiometer controls. I then screwed the potentiometer into the chassis.
Here’s what I have so far.

How about we check it out from the front?

Damn that looks intense.
Now all I need to do is wire up the insides. It will take four solder connections to make this happen – two on the potentiometer and two on the speaker. I have to wire connections from the potentiometer to the speaker, and from the speaker out of the unit (that wire will be connected to the Bluetooth amplifier).
First, I dry-tested the wires to make sure I had the right connections.
Cable to left post, check. Left post to negative speaker post, check. Positive speaker post to center post, check. Right post to cable, check.
Now for the solder.

It ain’t perfect, but it’s connected, and that’s all that matters, right?
Okay, now to thread the cable through the back end of the chassis, and connect the chassis shell together with the Holt screws.
I then threaded the two cable cords to a Bluetooth wireless amplifier. This is where the final magic must occur.

These speakers are monaural, so I can really only connect one channel (the right channel) to the Bluetooth amplifier, with the other wire going to the Bluetooth’s black (ground) post.
Okay. Let’s turn this bad boy on. Bluetooth amplifier activated. Paired with my BlackBerry KEYone phone. Go to YouTube and find a drive-in movie stinger, and play it through the BlackBerry. And use another phone – my vintage BlackBerry Q10 – to record the results.
And…
ACHIEVEMENT UNLOCKED. Speaker is now restored, Bluetooth compatible and sounding incredible. That’s right, I took this old, beat-to-shit speaker and turned it into something exquisite. You can use this newly restored drive-in speaker to play videos from your phone or from any Bluetooth-enabled device, so long as the unit is hooked up to the Bluetooth amplifier. This is incredible. New skills earned including aluminum painting, sanding, soldering, and aesthetics. Yeah, I can do lots of things in the times of COVID.
Scuse me while I dance.
Couple of things to note. If you think you’re going to get THX sound from these speakers, you’re mistaken. You’re going to get one channel of stereo sound. Either the left channel or the right one. Of course, that may be an impetus to create a second speaker set and hang them together on opposite sides of your widescreen flatscreen, but that’s on you if you do.
But I think that for me, I’m going to use these skills and maybe make one more set of Bluetooth-enabled drive-in speakers. Maybe something for a historical art project of some sort. Something that might be, shall we say, well built. 😀
LINKS FOR DRIVE-IN SPEAKER REPRODUCTION AND RESTORATION PARTS:

where did you find this old speaker?
LikeLike
Amazing what you can find on eBay these days…
LikeLike
Chuck, I found that so enjoyable and actually fascinating how you did that. What a terrific hobby. I wish I had those skills and ingenuity. Thank you for sharing this and stay safe.
LikeLike
Great project. It would be a neat thing to have in an auto-themed study.
BTW Ohm is standard measurement of resistance as a speaker is basically a resistor (forming an electromagnetic coil which interacts with the permanent magnet on the back of the speaker according to the signal). The old ‘pot’ (a variable resistor) might not have survived anyway as they are usually a carbon trace on a piece of phenolic board inside and often that deteriorates with time. Yes, this was my field for many years.
I have to criticize the colour choices though; the blue knob and green case are each great, but together they clash. Typically the knobs were bright so you could see them easily in the dark.
Useless trivia: The Music Man (1962) was the first movie I ever saw at a drive-in. 😀
LikeLike